Establish Yourself as the Pre-Eminent Authority – Use Well-Crafted Categories to Make Your Blog Ultra-Searchable
Why Are We Doing This? (Long-Term Peace-of-Mind and Prosperity)
This is the second blog on the subject of carefully crafting blog categories and tags. (Third, actually.)

Position yourself for the long term.
There’s no rah-rah with this. The subject matter is rather dry, and the work involved – in doing this right – is a fair chunk of time.
So why invest the effort, you may ask?
It’s all in how you want to position yourself for the future.
There are lots of coaches, counselors, and marketing gurus out there – and for the moment, I’m going to divide these coaches into roughly two camps. There are the rah-rah folks. They do give great advice; don’t get me wrong here. But one blog post could be about the power of focus. Another about clearly setting goals. Any one is as good as the next, and you are probably not too likely to go digging through their archives. If you get and read any of their posts in a given week, great. If not – there will be another, just as good, next week.
These are all good folks; they play a good role.
But I’m trusting – for purposes of our work together today – that you’d rather be in the other camp. This is the camp of the knowledge experts.
Remember, we’re talking about establishing you as King of the Hill in your particular area of expertise. This whole blog series (and Mourning Dove Press itself) is dedicated being a Kingmaker; to helping you get to the top of your game.
Our focus is strategic.
One of our primary goals is to help you develop that strong, secure knowledge base that will firmly establish you as a leader in your field.
This means that the content that you produce will be valuable. You’re writing – as I am right now – the equivalent of college lesson plans. People will come back to you again and again, because they’ll regard you as the authoritative source. And when they have a question about a topic, they’ll search first within your blog series – because they trust your content.
Imagine that.
Imagine that when people have a question in their minds – about something for which they know that you’re the expert – they go first to your blog, and check on your categories and tags. They read your blogs first. THEN – maybe – they do the Google search.
That would be pretty amazing, right?
For this to take place, your blog has to be very content-searchable.
Three Primary Tactics for Increasing Blog Topic Findability
There are three primary tactics that will make what you write more findable by others:
- Categories and subcategories – Logical, hierarchical organization of major topics and themes,
- Tag Cloud – Swirly, overall-impression, gestalt insight into people, places, things, and events that keep showing up in your blogs, together with topical threads that are like supporting actors, and
- Direct internal links (intralinks) to related blogs – You purposefully insert links – both within the blog post text and at the bottom of the blog – inviting the reader to follow a line of thought to other blog posts that you’ve pre-selected for them.
In this blog post, we’re focusing on the first issue – working carefully, diligently, and meticulously with categories and sub-categories. This will be your foremost and primary strategy to make what you write findable – for years to come – by people who will visit your blog.
A Case Study – Categories for a Hundred-Posts Blog
We’re using another blog as a Case Study, to illustrate the process of category conversion and refinement.

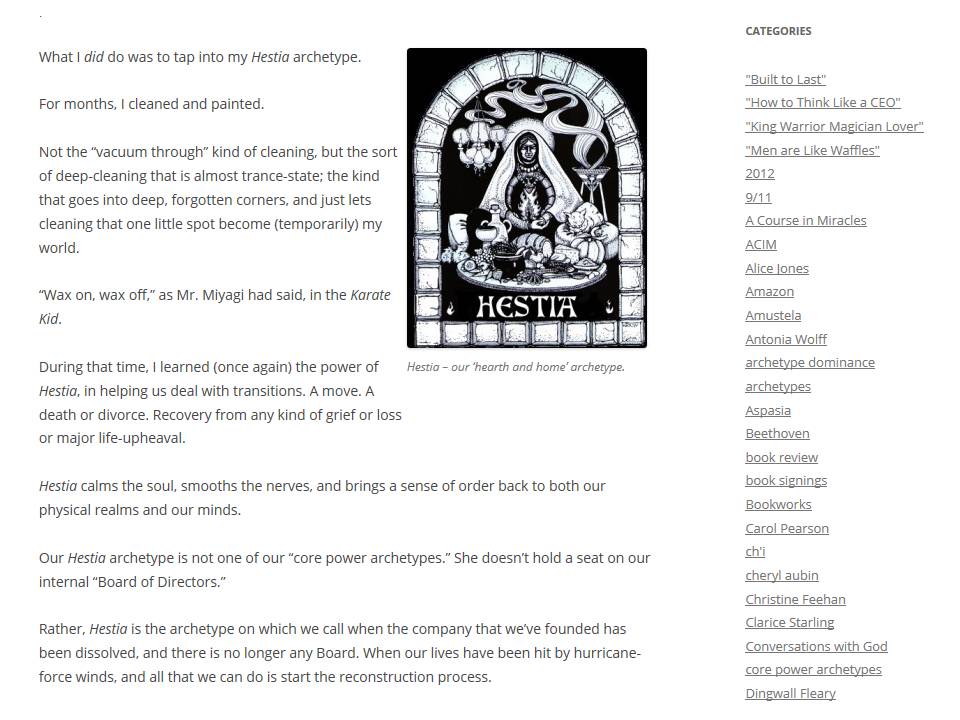
The blog associated with Unveiling: The Inner Journey is the Case Study material for this lesson on blog categories and subcategories.
The starting situation resulted from importing a Google Blogger blog series into WordPress. This blog series is an ongoing outreach based on a book (Unveiling: The Inner Journey) published in 2011. The blog – and the rest of the book’s web material – are now all at The Unveiling Journey.
The material used for today’s blog post lesson is taken from yesterday’s work on the other blog; that posting is When Your Inner Green Man Breaks from Cover.
If you are looking at that particular blog post some time substantially after this post is being written (on Wednesday, Sept. 4th, 2013), then you could see a real difference in the categories and tags on the blog versus those that are shown here as screen shots.
The reason?
Blog categories and sub-categories are something that I (as blog author) can change over time; I can add new categories, move categories around (make them subs or parents), even rename them. This can make the actual category names – and the organization of sub-categories – change over time.
Also, as I associate more blog posts with certain categories (this is the time-consuming part), you’ll see more posts after each category listed in the Categories sidebar widget.
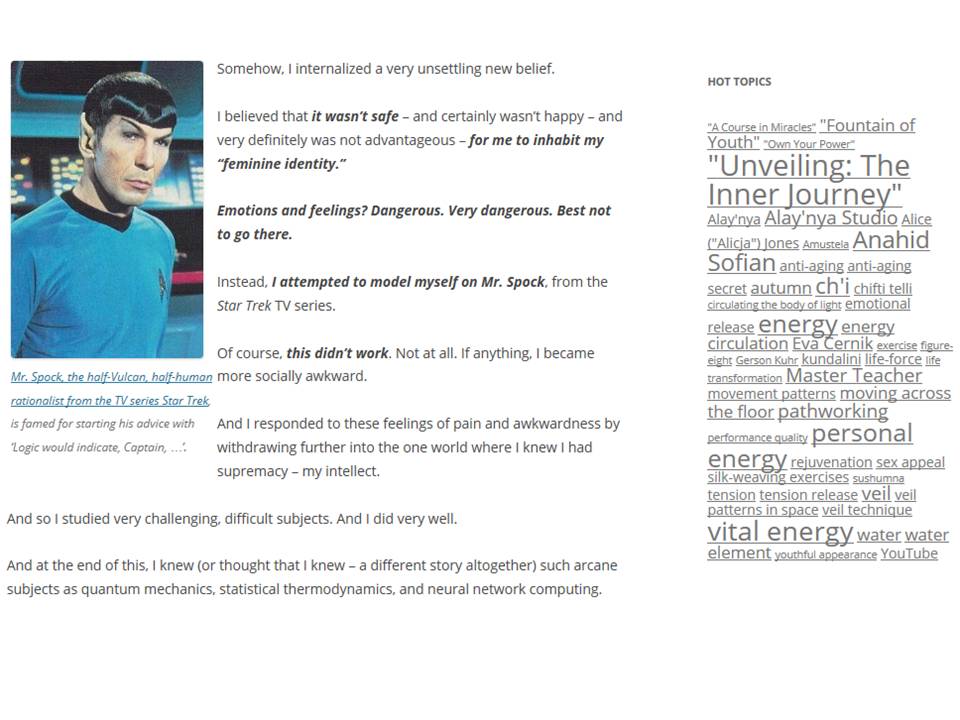
Finally, as I add more tags and refine the existing ones, the nature of the Tag Cloud will change.
Thus, today’s lesson is a snapshot in time – you can go to The Unveiling Journey and see the ongoing blog, but expect a few differences.
Today’s Lesson: Starting Sub-Category Creation and Refinement
This blog post will review the work done in the previous post, and take the next steps:
- Create useful sub-categories,
- Do a first pass on category consolidation, and create new parent categories as needed – so that certain existing categories can become sub-categories under a broader topic, and
- Attach new category (and sometimes sub-category) associations for each blog post – a time-consuming task that was started for this illustration, but which will take weeks – maybe months – to complete.
Starting Position: Categories Reduced in Number, but Still a “Flat Hierarchy”
In the previous blog post, Make It Easy for Others, we started the (rather arduous) process of category refinement.
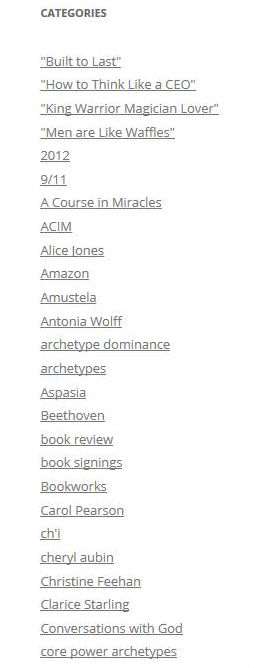
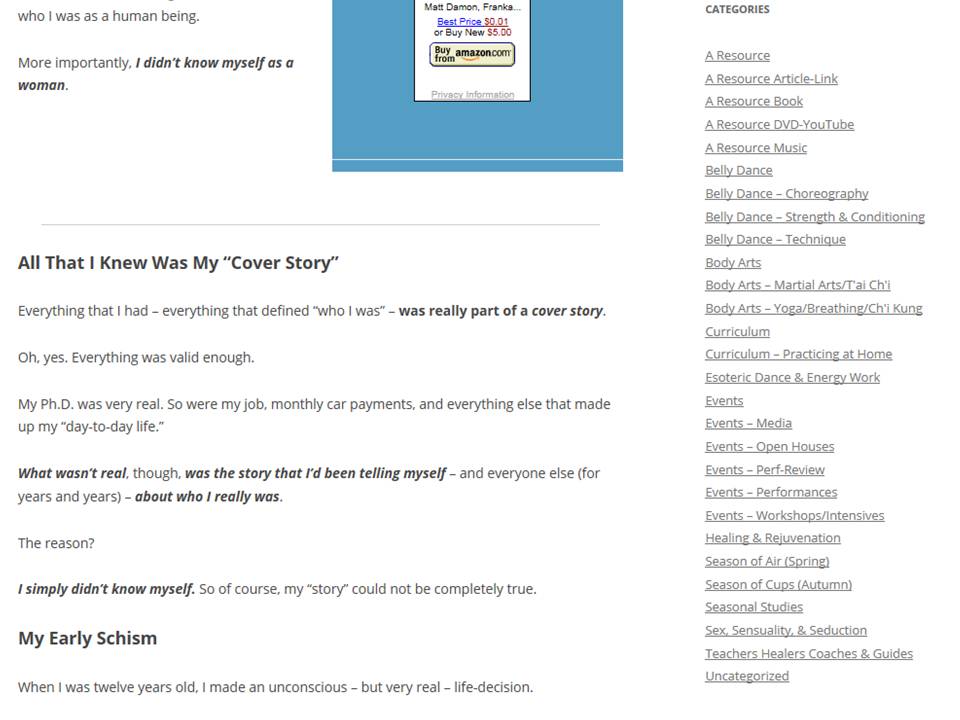
Initially, I’d imported a series of blog posts from Google Blogger. There were 94 blog posts, and a total of 135 categories – because the import mechanism made every Blogger “label” into a “category.”
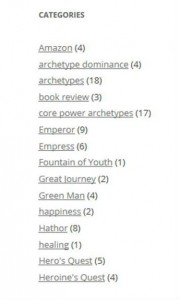
Categories in transition: the set of categories from the previous figure has been cut down by 2/3, resulting in a smaller, more manageable set.
Using the WordPress Categories to Tags Converter plug-in, I quickly moved 90 of those so-called “categories” to “tags.” (You can see a portion of the resulting new categories listing on the right; this figure was also shown in the previous blog post.)
This left me with 45 categories; still way too many.
In addition, while I intrinsically understood that there was a logical hierarchy in my categories, they were not yet evident in the category listing. This was something I’d have to create.
The next tasks were three-fold:
- Create appropriate sub-categories, and put them under the right parent-categories,
- Make sure each blog has both the right parent categories and sub-categories – this requires detailed checking, because often it will be the new parent category that has to be noted for each blog, and
- Combine redundant categories, eliminate unnecessary categories – a first pass at what will be a fairly time-consuming process.
This blog post concentrates mostly on Steps (1) and (2).
Step 1: Creating Sub-Categories
I created two major new categories, and changed a number of existing categories into sub-categories, under one or another of these two new major categories. The following figures show each.
The first major new category was “Archetype.” This was a simple decision; I knew that the blog content was about several different archetypes, and this was one of the most searchable topics.
Step 1A: Be Smart about Category Names
Hint: Choose category names that will show up at the top of the category listings – especially for high-value categories (those that you intend to be most searched). I made sure that the category label was Archetype, not Archetypes – this ensured that it was first in alphabetical order.
Also, I discovered that WordPress 2012 Theme allows us to show hierarchies with categories.
Step 1B: Show Category Hierarchies in the Category Widget – Make It Easy for Readers to Discern Sub-Categories Under Main Category Headings
The figure below shows how to cause the WordPress 2012 theme to show category hierarchies. This walk-through is for the case where you have a single sidebar, where you host all your various widgets for your blog.
First, while in the blog editor, select Appearance from the left-hand column. Under Appearance, select Widgets. This will bring up a screen of widget options. (You can see a partial screenshot of this in the figure below.) You can drag-and-drop widgets into the right hand sidebar; that will make them show up in the sidebar in blog posts and pages.
The Categories widget is already (typically) included in your sidebar’s standard settings. Click on Main Sidebar to see the options for your main pages.
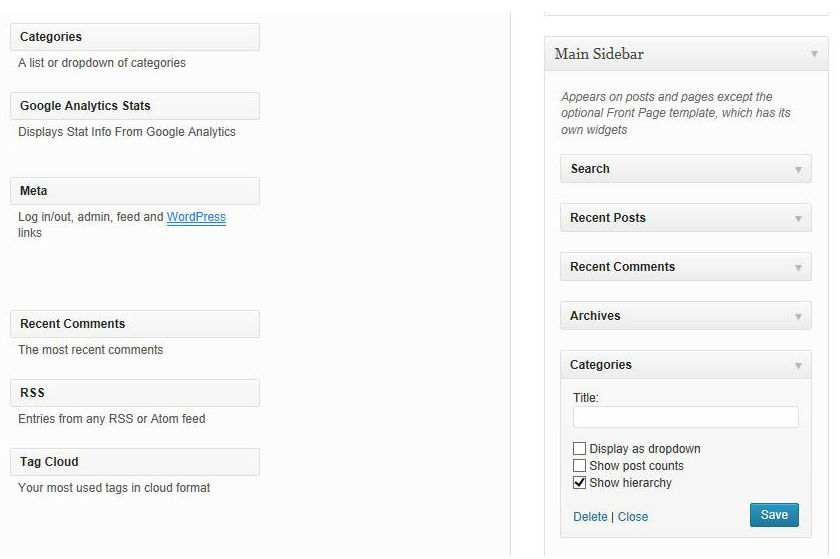
You can make category hierarchies appear by selecting ‘Show hierarchy’ in the Categories tab in your sidebar; use Appearance => Widgets to find this; click on the Main Sidebar option on the RH Sidebar.
Click on the Categories widget to see your selection options, as shown in the figure above.
Select (check) the Show hierarchy option under the Category widget in the sidebar listing.
Save the result. (Save button at lower right; see figure above.)
Step 1C: Start Creating Sub-Categories
The first category/sub-category step was obvious. I knew that many blog posts were about one or another of the various Core Power Archetypes discussed in the blog series; these were archetypes such as Amazon, Magician, Hierophant. It was important that people be able to see all the major archetypes at a glance.
One already-existing category was Archetype. (How convenient!)
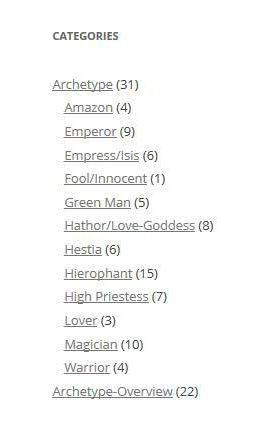
First set of sub-categories: Various specific archetypes are made sub-category to the new Archetype parent-level category.
I decided to make this the new parent for all the specific archetypes. Using the Categories Editor, I identified each of my existing archetypes (Amazon, etc.) as being a “sub” to the new “parent.” In this way, I transitioned twelve categories from being independent parent-level categories to subs under the main Archetype parent.
Since my goal is to reduce the number of parent-level categories to no more than seven (if possible), this was a pretty good first step.
As a side-benefit, since Archetype was a pre-existing category, and the blogs that dealt with any specific archetype (Amazon, Magician, etc.) were already pre-labeled with Archetype as well as the specific (and now sub) archetype, I didn’t have to associate the new Archetype parent category with the various blog posts. You can see that Archetype, as a parent category, has 31 blogs associated with it. Each specific archetype has a fewer number of associated posts; this makes sense. The parent category should always include each of the posts that are assigned to a sub-category.
Step 1C Continued: Make More Parent/Sub-Category Groupings
The first parent/sub-category group was obvious; I knew what I’d do before I started.
Once this first step was done, I took a look at the remaining categories. There were several that related to archetypes – but to sets of archetypes, or to interactions between them, or to other factors involving one or more of the different archetypes identified in the previous category. An example was Core Power Archetypes, which had 17 associated posts.
Thus, a new parent was in order. I created Archetypes-Overview, and made several of the existing categories to be subs to this new parent. You can see this in the figure below.
This figure is based on a screenshot taken while in the Categories Editor for the blog; the previous figures were taken from the “front view,” the blog as it appears when a reader normally accesses it.
This figure shows the category name, and the sub-categories under it – together with the SLUG (the label used for the category by WordPress), and the number of posts that are assigned to that category or sub-category.
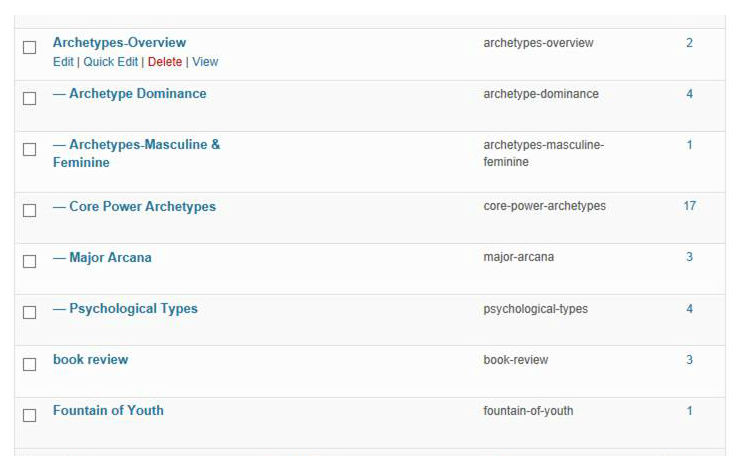
Refined Categories and Sub-Categories: collect related topics
Some order is beginning to appear: five pre-existing categories have now been made subs to the new Archetype-Overview parent category. However, because this is a new parent, it didn’t have any subs associated with it.
I began reading through the blogs – specifically, I clicked on the right-most Number for each of the sub-categories; that brought me to a listing of the blogs for that particular sub. Then, I read each blog. I associated the new parent Archetype-Overview with it, and also checked to make sure that other related categories – or sub-categories – were also associated. The figure above shows the result after I’d associated just two blogs with the new parent.
I also created a new sub-category; Archetypes-Masculine & Feminine. You can see that I’ve assigned one blog to it in this figure.
Step 2: Annotating Blog Posts with Right Categories & Sub-Categories
The figure below shows the result after I’d read five more blogs.
The number of blogs associated with the parent Archetype-Overview is now seven. While doing this, I realized that some of these blog posts needed to associate with other sub-categories as well; you can see that (in comparison with the last figure in the previous section), the number of Archetypes-Masculine & Feminine has risen from 1 to 6. (Not surprising; this was a new sub-category.)
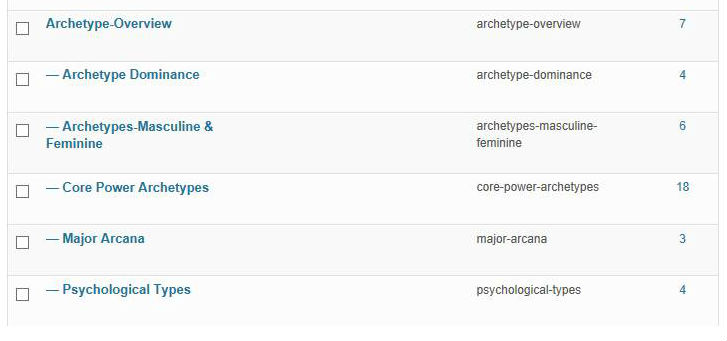
Blog Posts are being added to the new parent category(ies) to which they now belong.
Process Summary
You can see, from the figure on the right, that I’m making some progress – the number of blogs identified with the Archetype-Overview category is steadily increasing.
To do this, I look at each and every blog that has one of the sub-categories for Archetype-Overview attached to it. Does it have the parent category listed as well?
Of course it doesn’t, because I just created Archetype-Overview as a new parent, and made all the related categories be subs to that parent. That means that every blog carrying one of the sub-categories has to be manually associated to the parent as well.
Do This Yourself, or Hire It Out?
Admittedly, what I’m showing here is a time-consuming and tedious task.
You could possibly write out a detailed “Process Description” for this step, and have an administrative assistant do this task for you.
Right now, though, there’s some benefit in doing this myself. I’m looking over all my material – roughly grouped by topic (using the new sub-categories as a topical guide). It’s giving me an overview of what I have; what I’ve written when, and how my thinking has evolved.
I see some blogs that actually need to be moved out of this particular blog series and into another one. I see which blogs are most essential; they capture my best thinking on a topic.
You are the owner of your own blog content. If you’re conducting a major blog review-and-revision, then reading through your own material is a good step. You can note which blogs contain your most significant information. (You can also install a plug-in to track which are most popular over time; but since you can direct people’s attention, I wouldn’t rely on that exclusively.)
You can see where you began a topical thread, and might want to schedule it in for your Editorial Calendar (assuming that you have one; if not, this is a good time to create such a calendar – more on that in a different blog).
In short, doing this yourself, hiring someone to do it for you, or splitting the workload is a very personal decision. It has a lot to do with what kinds of content you have, and how carefully you want to personally control how your content is labeled and made findable to others.
Step 3: Blog Intra-Linking
We’ve done a lot in this blog, and so we’ll close with just one very small step that you can take – if you plan to be very diligent about directing your reader’s attention.
I’d written – at the beginning of this blog – that this was second in a series.
I was wrong. This is actually the third blog post in a series on categories, sub-categories, and tags. This particular post is by far the most technical and detailed. However, the two preceding posts give valuable context and motivation. They also discuss the role of the Tag Cloud, which I’ve not mentioned at all in this post.
Use Intra-Linking to Direct Readers to Related Posts
How to get readers to check out your related blogs? Simple. Point them right to it. I’m going to do this below. You’ll see my signature, and then – a Related Posts section.
Try this yourself.
It’s just one more thing; it takes additional time and energy, but it’s sort of like tucking in the threads after doing needlework – it gives your blog a finished sense. It also lets people know that you’re dealing with a theme; they will respect you as creating a body of work – not a simple one-off piece.
I’m going to put the Related Posts here – and some day in the future, I’ll go to the blogs identified in this particular Related Posts – and update them with their own Relateds.
Time-consuming, yes. But it’s the detail work that counts.
To your own success –
Alianna
Related Posts


